Why Is My MacBook (M3) Not Charging?
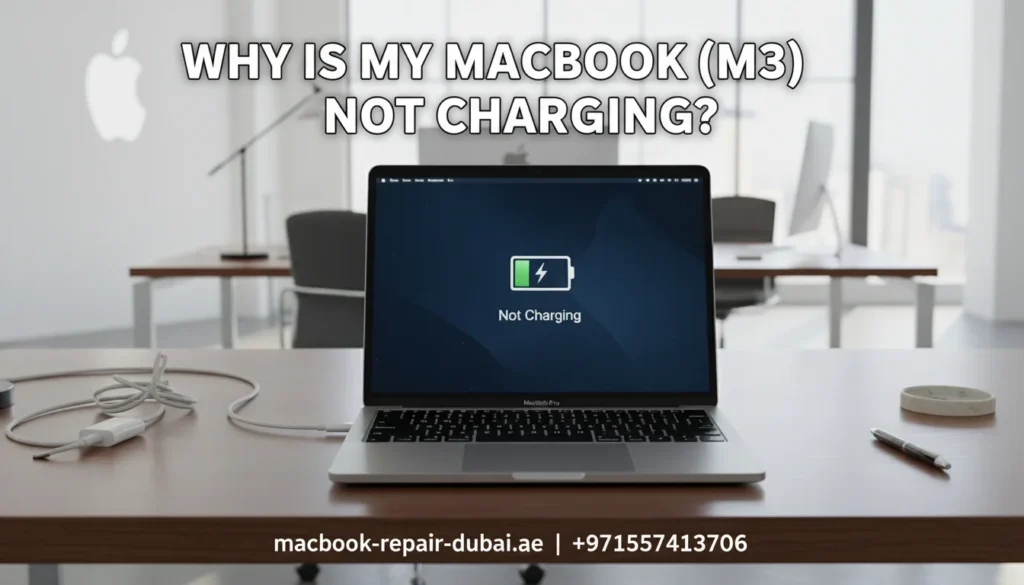
Why Is My MacBook (M3) Not Charging? So, you plug in your brand-new MacBook M3, expecting the familiar charging sound, but nothing happens. The battery percentage stays the same, or worse, your MacBook starts draining power even while plugged in. If you are wondering, “Why is my MacBook (M3) not charging?” You are not alone. Despite the powerful M3 chip and efficient macOS system, charging issues can still occur due to a range of hardware and software factors. In this article, we will explore all the possible causes and provide step-by-step solutions for fixing the issue without stress. Common Reasons Your MacBook M3 Would Not Charge Whether a MacBook Air M3 or MacBook Pro M3, the charging mechanism follows the same USB-C-based system. Here are some common reasons why it might not work: Defective charging cable or power adapter. Dirty or damaged USB-C port. macOS’s software glitch. Battery calibration problems. Hardware failure, such as a damaged logic board. Let’s take a deeper look into how you can troubleshoot these issues. Step-by-Step Fixes for MacBook M3 Charging Issues 1. Check Your USB-C Cable and Adapter Your first step should always be to inspect the charging cable and power adapter. Ask yourself: Is the cable bent or frayed? Is the adapter unusually hot? Are you using an original Apple-certified charger? Try this fix: Use another Apple-certified USB-C charger to check if the MacBook starts charging. If so, your charger is the issue. You can view Original Apple adapters here. 2. Check and Clean Your USB-C Port A dirty or damaged charging port can block proper contact between the MacBook and charger. Shine a flashlight to spot dust, lint, or debris. Carefully clean the port using a soft brush or compressed air. Avoid using metallic objects, as they could cause static damage. 3. Change Your Power Source Sometimes, the problem lies with the outlet, not your MacBook. Switch to another power outlet. Avoid charging through an extension cable. Test by plugging into another wall socket or power strip. 4. How to Update Your macOS Apple often releases battery and charging bug patches in newer models like the M3. To check for updates: Click Apple logo > System Settings > General > Software Update Install any available updates. Restart your MacBook afterward to apply the fix. If your system feels unstable after updates, consider a full MacBook reset. 5. Reset the SMC (System Management Controller) Although M3 Macs do not have a manual SMC reset like Intel-based ones, shutting down your device often helps resolve power-related glitches. Turn off your Mac completely. Pause for 10 seconds. Restart your Mac and connect the charger. For older Intel Macs: Reset the SMC manually using Shift + Control + Option + Power. 6. Check Battery Health Sometimes the battery itself is the issue. How to check it: Go to System Settings > Battery > Battery Health If it shows service recommended, your battery might be damaged or worn. In such cases, consider MacBook battery replacement professionally. 7. Run Apple Diagnostics Still not working? Run Apple Diagnostics to identify any hardware issues: Power off your MacBook. Turn it on and immediately hold down the D key. Follow the on-screen prompts. This test will help you find issues with logic boards, Battery, or power components. For more serious problems, visit our Apple service center in Dubai. When to Seek Professional Help If none of these steps work, your MacBook M3 might have a hardware problem, such as: Burnt charging IC Faulty logic board Damaged battery connector Overheating sensors are preventing charging. At this stage, it is best to seek help from a professional Apple repair technician. Summary Table: MacBook M3 Not Charging Problem Solution Faulty USB-C cable Try another certified charger Dusty or broken port Clean port with compressed air Power source issue Use a direct power outlet Outdated software Update macOS Battery wear Check battery health & replace Internal hardware failure Run Apple Diagnostics Final Thoughts The MacBook M3 is a powerhouse machine, but even top-tier laptops can have charging issues. Most problems are minor and can be resolved with a few simple steps. Start with your cable, adapter, and software settings, and move toward more technical solutions if needed. If you are in the UAE and need fast, reliable, and professional Apple device repair services, look no further than MRD. Whether your MacBook M3 has a dead battery, charging port issue, or advanced hardware repair, our expert technicians are ready to help you get it back in perfect shape. Final Contact Form First NameLast NameEmailPhone NumberDevice ModelYour MessageSubmit Form Related Posts MacBook Repair Dubai Mac Guide Why Is My MacBook (M3) Not Charging? May 22, 2025-Abdul Aziz … Read More… How Can I Fix a MacBook Air That Won’t Charge? May 22, 2025-Abdul Aziz … Read More… How to Take a Screenshot on a MacBook May 15, 2025-Abdul Aziz … Read More… How to Change MacBook Name May 15, 2025-Abdul Aziz … Read More… How to Install Windows on MacBook Pro May 15, 2025-Abdul Aziz … Read More… How to Reset a MacBook May 15, 2025-Abdul Aziz … Read More… Load More End of Content.
How to Reset a MacBook
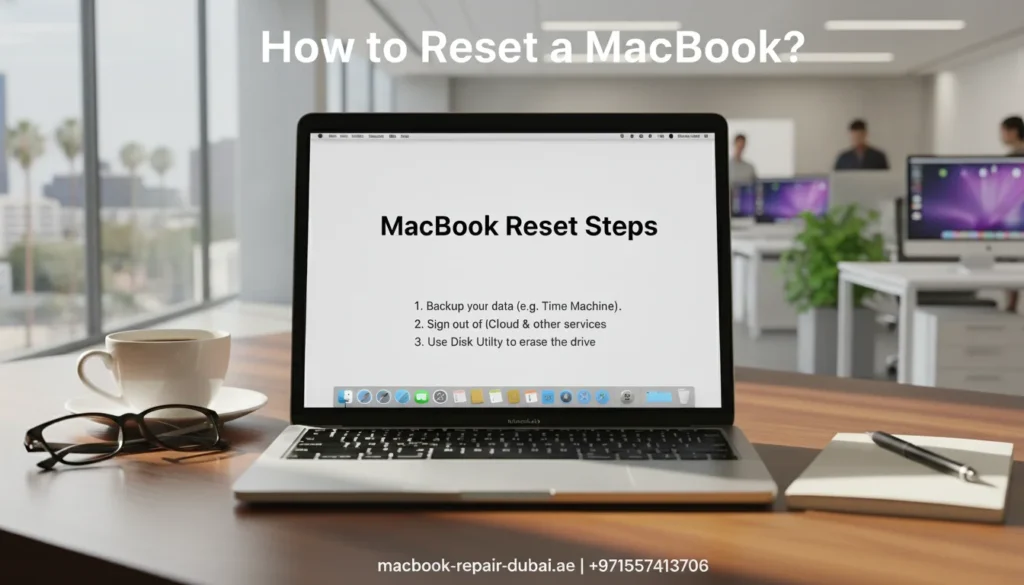
How to Reset a MacBook Are you thinking of resetting your MacBook? Whether you want a fresh start, sell your Mac, or fix slow performance, this guide will help you do it easily. This page teaches you how to reset your MacBook, format it, and delete apps and applications completely. You do not need any technical skills just follow these simple steps. What Does It Mean to Reset Your MacBook? Resetting your MacBook means returning it to its original condition, like when you bought it. This is useful when: Your Mac is slow or freezing Sell it or give it away your choice. You want to fix bugs or errors. Let’s learn the correct way to do it. (Fast & Easy) Guide to Factory Resetting Your MacBook A factory reset will erase everything and reinstall macOS. Simply follow these steps to factory reset your MacBook: Backup your files with Time Machine or iCloud. Log out of iCloud, iMessage, and Find My Mac before moving on. Restart your Mac and hold Command + R until the Apple logo appears. Choose Disk Utility → Select your hard drive → Click Erase. After formatting, go back and click Reinstall macOS. Let your Mac reinstall the system and follow the setup steps. That is how to factory reset a MacBook safely! How to Format a MacBook Properly Formatting your MacBook is part of the reset process. It clears the hard drive so that you can reinstall macOS without any old data. Steps to format your MacBook: Start in Recovery Mode (Command + R). Open Disk Utility. Select your disk (Macintosh HD), then click Erase. Select either APFS or Mac OS Extended (Journaled) as the format. Click Erase again to confirm. Your Mac is now formatted and ready for a clean setup. A Simple Guide to Deleting Apps on Your MacBook You do not always need to reset your Mac. Sometimes, deleting a few apps is all it takes to make it faster. To delete apps on a MacBook: Open Finder → Go to Applications. Just drag the app to the Trash to delete it. Right-click Trash → choose Empty Trash. This is perfect for clearing up space or removing unused software. How to Delete Applications on a MacBook Completely Some apps leave behind hidden files even after deletion. To delete applications completely: Use Finder to move the app to the Trash. Open and go to the folder (Shift + Command + G). Type these one by one: ~/Library/Application Support ~/Library/Caches ~/Library/Preferences Delete the leftover files related to the app. Optional: Use free tools like AppCleaner to remove apps and all their files in one click. Quick Look: MacBook Reset Tasks Task Steps Needed What It Does Factory Reset MacBook 6 steps via Recovery Mode Full system reset Format MacBook 5 steps with Disk Utility Erases hard drive Delete Apps on MacBook 3 steps from Applications folder Removes visible app only Delete Applications on MacBook 5+ steps (manual cleanup) Removes app + leftover hidden files Final Thoughts Resetting your MacBook does not have to be hard. Whether you need to factory reset, format, or delete apps, following the right steps will keep your device clean and running like new. Tip: Always back up your data before formatting or resetting. Need help in the UAE? Visit MRD, your trusted source for fast, professional, and Mac support. For any questions or to get professional assistance, feel free to contact us. Final Contact Form First NameLast NameEmailPhone NumberDevice ModelYour MessageSubmit Form Related Posts Mac Guide Why Is My MacBook (M3) Not Charging? May 22, 2025-Abdul Aziz … Read More… How Can I Fix a MacBook Air That Won’t Charge? May 22, 2025-Abdul Aziz … Read More… How to Take a Screenshot on a MacBook May 15, 2025-Abdul Aziz … Read More… How to Change MacBook Name May 15, 2025-Abdul Aziz … Read More… How to Install Windows on MacBook Pro May 15, 2025-Abdul Aziz … Read More… How to Reset a MacBook May 15, 2025-Abdul Aziz … Read More… Load More End of Content.
How to Erase All Data on My Mac Before Giving It Away?

How to Erase All Data on My Mac Before Giving It Away? Thinking about selling or handing over your Mac? Before giving your Mac to someone else, make sure to wipe all personal data to keep your information safe. Macs store a lot of sensitive information from emails to passwords so a proper data wipe is essential. In this guide, we will show you how to securely erase Your Mac and reset it to factory settings. And if you need expert help at any step, MacBook Repair Dubai is here to help with safe, professional Mac services anywhere in the UAE. Why It is Important to Erase Data Before Giving Away Your Mac Your Mac holds much more than just files; it contains passwords, emails, photos, personal notes, messages, browsing history, and even bank information. Simply deleting files or logging out of apps is not enough. Here is why a full data wipe is critical: Protects your privacy and identity Prevents unauthorized access to your Apple ID or iCloud Ensures a smooth setup experience for the next user By erasing your Mac properly, you give the new owner a fresh start while keeping your own data safe. Step-by-Step Guide: How to Erase All Data on Your Mac Follow these steps to safely and completely erase your Mac before giving it away: Step 1: Backup Your Important Data Before erasing your Mac, back up anything you might need later. Try any of the methods listed below: Time Machine – Apple offers a built-in tool that allows you to create a full backup of your system on an external drive. iCloud – Save documents, photos, and other files to your iCloud account. External Drives – Manually drag and drop important files to a USB or external SSD. Need help recovering files before a wipe? Try our MacBook data recovery service. Step 2: Sign Out of Apple Services This step ensures the new owner would not get locked out of the Mac due to Activation Lock. Sign out of all Apple services: iCloud: Go to System Settings > Your Name > iCloud > Sign Out Apple ID: Sign out from System Settings > Your Name iMessage: Open Messages > Preferences > iMessage > Sign Out Find My Mac: Disable this from iCloud settings. Step 3: Erase Your Mac (Factory Reset) The method depends on your macOS version and Mac model. For macOS Ventura or Later (with Apple Silicon or T2 chip): Go to System Settings > General > Transfer or Reset > Erase All Content and Settings. Enter your password and follow the prompts. Your Mac will reset and restart For Older macOS Versions (Intel Macs): Restart your Mac and immediately hold Command (⌘) + R to enter macOS Recovery. Choose Disk Utility from the macOS Utilities window. Selecting your main startup disk is typically labeled Macintosh HD. Click Erase, and choose APFS or macOS Extended (Journaled) depending on your Mac. After erasing, close Disk Utility and choose Reinstall macOS Your Mac will be clean, with the OS reinstalled and no user data remaining. Step 4: Set Up or Shut Down After reinstalling macOS, your Mac will display the welcome screen. At this point: If you are giving it away, simply power it off and let the new user complete the setup. If you are selling it, keep the Mac in its clean, factory-reset state for a more appealing sale. Bonus Tips: Preparing Your Mac Physically Before handing over your Mac: Clean the screen and keyboard with a microfiber cloth Remove stickers or skins. Organize the charging cable neatly. Place it in the original box (if available) for a more professional presentation. Need Help? Visit MacBook Repair Dubai If you encounter any issues during the erasing process, or you are unsure whether your Mac has been fully wiped, MRD offers expert Mac services in the UAE. Whether it is a stuck iCloud account, failed macOS reinstallation, or hardware cleanup, our team can prepare your Mac professionally before you give it away. Final Thoughts Erasing all data from your Mac before giving it away is a must both for your peace of mind and the new owner’s convenience. Whether it is backing up data, signing out of iCloud, or doing a factory reset, these steps make sure your Mac is secure, spotless, and fully prepared for its next owner. Remember, if you need help at any step, reach out to MRD for professional support in formatting, reinstalling macOS, and safely preparing your device. Whether you are gifting your Mac or selling it, a properly erased and reset system makes all the difference. Feel free to contact us for quick support, expert advice, or to schedule a service. Final Contact Form First NameLast NameEmailPhone NumberDevice ModelYour MessageSubmit Form Related Posts Mac Guide Why Is My MacBook (M3) Not Charging? May 22, 2025-Abdul Aziz … Read More… How Can I Fix a MacBook Air That Won’t Charge? May 22, 2025-Abdul Aziz … Read More… How to Take a Screenshot on a MacBook May 15, 2025-Abdul Aziz … Read More… How to Change MacBook Name May 15, 2025-Abdul Aziz … Read More… How to Install Windows on MacBook Pro May 15, 2025-Abdul Aziz … Read More… How to Reset a MacBook May 15, 2025-Abdul Aziz … Read More… Load More End of Content.
Why Won’t My MacBook Turn On?
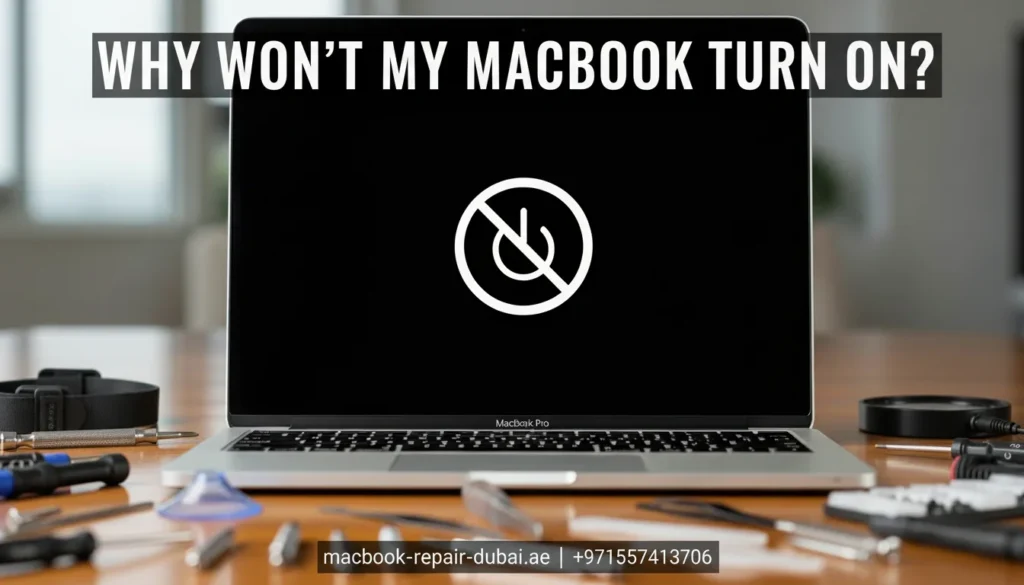
Why Won’t My MacBook Turn On? Has your MacBook suddenly refused to turn on? You press the power button, but your MacBook does not turn on. It is a common problem that can occur for many reasons, from a simple software issue to more complex hardware failures. At MRD, we understand how frustrating it can be when your MacBook lets you down especially when you count on it for work, school, or everyday tasks. There are several potential causes for this issue; thankfully, many of them can be fixed with a few easy steps. This article will guide you through troubleshooting methods to get your MacBook back up and running, or help you determine if it is time for a repair. Step-by-Step Guide to Fix a MacBook That Won’t Turn On Step 1: Check the Power Source Before assuming a serious problem, make sure you properly charge your MacBook. Here are some quick checks to do: Check the charger: Ensure your charging cable and adapter are securely connected. Inspect for damage: Check if there is any visible damage to your charging cable or adapter. Try a different outlet: Try plugging the charger into a different power outlet to make sure the problem is not with the socket. If the battery is not charging or seems completely dead, you might need MacBook battery replacement in Dubai. Step 2: Reset the SMC (System Management Controller) The System Management Controller (SMC) handles key hardware functions such as power management and charging. Resetting the SMC can often fix power issues. Here is how you can do it: For MacBook with T2 Security Chip: Turn off your MacBook completely. Press and hold the Control, Option (Alt), and Shift keys on the left side of the keyboard for 7 seconds. While holding those keys, press the Power button for an additional 7 seconds. Release all keys, wait a few seconds, then turn your MacBook back on. For MacBook without T2 Security Chip: Shut down your MacBook. Hold Shift + Control + Option on the left side of the keyboard, then press and hold the Power button. Press and hold all four keys for 10 seconds. Release the keys and turn on your MacBook. Resetting the SMC can help with power-related issues, including when your MacBook is malfunctioning. Step 3: Perform a Hard Reboot If your MacBook is stuck on a frozen screen and unresponsive, a hard reboot may help. For a MacBook with a non-removable battery: Press and hold the Power button for 10 seconds. Release the power button, wait a few seconds, and press it again to turn the MacBook on. A hard reboot forces the MacBook to restart and can fix issues caused by software crashes. Step 4: Check for Display Issues Sometimes, it turns on your MacBook, but the screen is blank or malfunctioning. Here is how to check: Adjust the brightness: Make sure you turn up the screen brightness. External display: Connect your MacBook to an external monitor to see if the issue is with the screen. Listen for startup sounds: If you hear the startup chime or the fans running, but the screen remains black, it is likely a display issue. If the MacBook shows signs of life, but the screen stays black, you may need professional help to fix the display. Step 5: Look for Signs of Hardware Issues You could face a hardware issue if your MacBook still does not turn on. This might include: Loose or damaged connections: A loose cable or a damaged logic board can prevent the MacBook from powering on. Battery failure: If the battery is damaged or completely dead, your MacBook might not turn on even if plugged in. Motherboard failure: A malfunctioning motherboard can significantly cause power issues. If you think there is a hardware issue, it is best to visit a professional repair service. Step 6: Seek Professional Help If none of these steps worked, it is time to consult an expert. Here are some common issues that may need professional repair: Your MacBook does not turn on at all. The screen is flickering or completely black. There is visible damage to the battery or motherboard. At MRD, we provide professional diagnostic services and repairs to fix power issues. Our technicians use genuine parts to restore your MacBook to full functionality. Bonus Tips: Keep Your MacBook Running Smoothly To avoid future power issues, consider these maintenance tips: Regularly charge your battery between 40% and 80% to extend battery life. Clean your MacBook: Dust buildup can cause overheating and other issues. Update your macOS: Keep your software updated to fix bugs that might cause power-related issues. If you’re planning to sell your device after fixing it, check out our article on how to prepare your Mac before giving it away. Conclusion If your MacBook is not turning on, do not panic. It could be a simple fix like charging your device, resetting the SMC, or performing a hard reboot. If the issue continues, it might be a sign of a more serious hardware problem that requires professional help. At MRD, we are here to help with all your MacBook issues, from power problems to complex repairs. Visit us today for free diagnostic and professional repair services to restore your MacBook to its best condition. Contact us today for a free diagnostic or visit our shop for same-day service. Final Contact Form First NameLast NameEmailPhone NumberDevice ModelYour MessageSubmit Form Related Posts Mac Guide Why Is My MacBook (M3) Not Charging? May 22, 2025-Abdul Aziz … Read More… How Can I Fix a MacBook Air That Won’t Charge? May 22, 2025-Abdul Aziz … Read More… How to Take a Screenshot on a MacBook May 15, 2025-Abdul Aziz … Read More… How to Change MacBook Name May 15, 2025-Abdul Aziz … Read More… How to Install Windows on MacBook Pro May 15, 2025-Abdul Aziz … Read More… How to Reset a MacBook
Error 403 Forbidden on MacBook and says can’t connect to Apple servers.
The server gave an error during download 403 forbidden If your MacBook shows a 403 Forbidden error or tells you it can not connect to Apple’s servers, it can be confusing and annoying. This problem often happens when there is a disruption between your Mac and Apple’s network, stopping services like iCloud or the App Store from working properly. Fortunately, you can often fix the issue with a few quick troubleshooting steps. In this guide, we will walk you through the possible reasons behind the error and show you how to get back online and connect to Apple servers quickly. For deeper issues, you can also visit MacBook Repair Dubai for expert help. What Is Error 403 Forbidden? The 403 Forbidden error means your MacBook is trying to access a website or server, but the request is being rejected. If it says “can not connect to Apple servers”, it usually means something on your device or your internet network is blocking access. This error commonly occurs when: Your MacBook has incorrect date or time settings Your DNS settings are misconfigured. You are using a restricted network (like a school or work Wi-Fi) A firewall, VPN, or security software is interfering. Apple servers are temporarily down. Common Situations Where This Error Appears You may see the 403 error or connection problem while trying to: Sign in to your Apple ID Connect to iCloud Download or update apps from the App Store. Install a macOS update. Open FaceTime or Messages No matter when it shows up, the fix is usually simple. Let’s walk through the best ways to identify and fix the problem. How to Fix Error 403 and “Can’t Connect to Apple Servers” on MacBook 1. Check Date and Time Settings Wrong date or time settings can lead to security issues, blocking access to Apple servers. Steps: Go to System Settings > General > Date & Time Turn on set date and time automatically in your settings. Ensure your time zone is set correctly. Restart your MacBook and try again. Incorrect time can also affect your device’s battery performance. If you suspect deeper hardware issues, check our MacBook battery replacement service. 2. Change DNS Settings Using the wrong DNS (Domain Name System) server can block certain websites and services. Steps: Go to System Settings > Network > Wi-Fi > Details Click DNS Remove any old DNS entries. Add Google DNS: 8.8.8.8 and 8.8.4.4 Click OK and reconnect to Wi-Fi. Try signing in to Apple services again. 3. Restart Your Router and MacBook Sometimes, The error is just a glitch in the network. Switch off your Wi-Fi router, wait 30 seconds, then power it back on and restart your MacBook. Try reconnecting to the network to see if that solves the issue. 4. Disable Your VPN or Proxy If you are using a VPN, proxy, or security software, it may be blocking Apple servers. Go to System Settings > Network > VPN. Disable any VPN or proxy settings. Try again without the VPN. 5. Try a Different Network If your school, work, or public Wi-Fi has restrictions, try using your mobile hotspot or a different network. If the issue goes away, the original network may have firewall rules that block Apple services. 6. Update macOS An outdated system might have expired certificates or bugs causing the issue. Navigate to System Settings > General > Software Update. Download and install the latest macOS version. 7. Check Apple System Status Visit Apple’s System Status page to check for any ongoing server issue. Sometimes, Apple’s services may be temporarily down. 8. Use Safe Mode Safe Mode starts your Mac with only essential software and disables extensions. Steps: Shut down your Mac completely. Power it on while holding down the Shift key. Let go of the Shift key once the login screen shows up. Try accessing Apple services again. When to Get Help If you have tried all of the above and are still getting the error, there may be a deeper software or hardware issue. It might be caused by: Damaged system files Broken network hardware A macOS bug that requires reinstalling the OS Don’t worry. Our certified experts are ready to help with MacBook Pro repairs, Air models, or even M1/M2 chip issues. Let MacBook Repair Dubai Fix It for You At MRD, We specialize in solving all kinds of MacBook problems, including: 403 Forbidden errors Apple ID sign-in issues iCloud connection problems macOS reinstallation Wi-Fi and DNS troubleshooting We offer quick diagnostics, expert repairs, and same-day service across Dubai. Our certified technicians are experts in handling Apple products. Whether your MacBook Air, MacBook Pro, or iMac is showing the error, we have the tools to fix it. Final Thoughts The Error 403 Forbidden and “Can not connect to Apple servers” message may seem scary, but it is usually a fixable issue. Start with the basic solutions above, like checking your time settings, DNS, or internet connection. If the error still would not go away, contact the experts at MRD. We will help you get your MacBook back online, so you can safely use iCloud, update your apps, and access all your Apple services without stress. Contact us today or chat with our support on WhatsApp. We’ll get your MacBook running and connected—fast. Final Contact Form First NameLast NameEmailPhone NumberDevice ModelYour MessageSubmit Form Related Posts Mac Guide Why Is My MacBook (M3) Not Charging? May 22, 2025-Abdul Aziz … Read More… How Can I Fix a MacBook Air That Won’t Charge? May 22, 2025-Abdul Aziz … Read More… How to Take a Screenshot on a MacBook May 15, 2025-Abdul Aziz … Read More… How to Change MacBook Name May 15, 2025-Abdul Aziz … Read More… How to Install Windows on MacBook Pro May 15, 2025-Abdul Aziz … Read More… How to Reset a MacBook May 15, 2025-Abdul Aziz … Read More… Load More End of Content.
Do MacBooks Last Over a Decade?

Do MacBooks Last Over a Decade? When your MacBook starts to slow down, you may wonder, “How long do MacBook’s last?” or “Does the MacBook last over a decade?” Many worry that their device is on its last legs, especially if it has been a few years since they bought it. At MRD, we see this all the time. Even if your MacBook feels slow, it does not always mean you need to replace it. Apple creates MacBook to be long-lasting, but their lifespan depends on the specific model, how you use it, and how well you take care of it. This article will help you understand how long a MacBook lasts, the signs that your device may be aging, and what you can do to extend its life. How Long Do MacBooks Last? Signs of Aging and When to Repair or Upgrade Step 1: How Long Does MacBook Last? MacBook last between 6 and 8 years on average, but some can last over 10 years with proper care. The longevity of a MacBook depends on several factors, including: Model type Usage frequency Regular maintenance Battery health MacBook Pro models usually last longer due to better hardware. However, even an older MacBook Air can last if you take care of it well. If your battery drains quickly, you may need a MacBook battery replacement in Dubai. Step 2: Signs Your MacBook Is Aging Here are some of the most common signs that your MacBook is getting old and may need fixing. The battery drains quickly Frequent slowdowns, even with basic apps Fan noises that never goes away Can not install the latest macOS Screen glitches or keyboard issues Do not worry if you notice these signs; your MacBook is not done yet. It may just need a repair or an upgrade. Step 3: Lifespan Comparison of MacBook Models Here is a breakdown of MacBook models and their expected lifespan: MacBook Model Average Lifespan Best Use Battery Life MacBook Air (2010–2020) 6–7 years Basic tasks like browsing and office work Very good MacBook Pro (2012–2020) 7–9 years Design, editing, heavy apps Excellent MacBook Pro (M1, M2, M3, M4) 8–12 years Power users (coding, video editing) Outstanding MacBook (2015–2019) 5–7 years Light tasks (email, browsing) Good, but decreases fast Older MacBook Models 4–6 years Basic use only Weak or needs replacement M1, M2, M3, and M4 MacBook are designed to last the longest, with many lasting well over a decade. If you own one of these newer models, you are in luck. Step 4: Repair or Replace? If you are unsure whether to repair or replace your MacBook, here is an easy guide to help you make the decision. Battery issues? → Get a battery replacement Slow performance? → Upgrade RAM or SSD Can’t install updates? → Consider upgrading or replacing Multiple issues? → Visit MacBook Repair Dubai for expert help We advise whether a repair is enough, or if it is time to upgrade your MacBook to the latest model. Step 5: How to Make Your MacBook Last 10+ Years Want your MacBook to last longer? Here are some simple tips to help it stay in good condition: Make sure to update macOS regularly. Keep your screen, keyboard, and ports clean. Do not use your MacBook on soft surfaces like a bed or couch. Place your MacBook on a cooling pad or a flat surface. Turn off your MacBook at least once a week to keep it refreshed. Keep it in a padded case when you are not using it. Even older models can last 8 years with proper maintenance, and new models may easily go beyond 10 years. Step 6: When to Visit a Professional Repair Service Some issues need expert repair. You should visit MRD if you notice: Your MacBook would not turn on Screen issues, such as flickering or cracks Liquid damage The keyboard or trackpad stops responding. You see the question mark folder at startup. At MRD, we use genuine parts and the best tools to restore your MacBook to top shape. Bonus: Speed Up Your MacBook Before Replacing It If your MacBook feels slow, try these simple tricks to improve performance before thinking of replacing it: Delete old files or transfer them to iCloud. Make sure all your apps are updated to the latest version. Restart your MacBook once a week. Close any apps you do not need running in the background. Remove dust from the vents and fans. These minor fixes can make a big difference and give your MacBook a new life. Conclusion: Can MacBooks Last Over 10 Years? Yes, MacBook can last over a decade if they are correctly maintained. Models like the MacBook Air, MacBook Pro (M1, M2, M3, M4), and even older ones can easily last 6–8 years, sometimes even longer, with proper care. Before you decide to replace your MacBook, consider visiting MRD. We offer free diagnostics, professional repairs, and expert advice on whether your MacBook needs a repair, an upgrade, or it is time to part ways with it. Final Contact Form First NameLast NameEmailPhone NumberDevice ModelYour MessageSubmit Form Related Posts Mac Guide Why Is My MacBook (M3) Not Charging? May 22, 2025-Abdul Aziz … Read More… How Can I Fix a MacBook Air That Won’t Charge? May 22, 2025-Abdul Aziz … Read More… How to Take a Screenshot on a MacBook May 15, 2025-Abdul Aziz … Read More… How to Change MacBook Name May 15, 2025-Abdul Aziz … Read More… How to Install Windows on MacBook Pro May 15, 2025-Abdul Aziz … Read More… How to Reset a MacBook May 15, 2025-Abdul Aziz … Read More… Load More End of Content.
How to Recover a Forgotten Login Password on a MacBook?
How to Recover a Forgotten Login Password on a MacBook? Forgetting your MacBook login password is frustrating, but it is not the end of the road. If you have been locked out of your MacBook and can not remember the password, do not panic. There are several ways to recover it. No matter if you are using a MacBook Air, MacBook Pro, or one with an M1/M2 chip, the steps to reset password are mostly the same. At MRD, we understand how stressful it can be to forget your login credentials. Do not worry; we are here to help you get back into your MacBook. This guide will walk you through each step to recover your password and unlock your device. Step-by-Step Guide to Reset a Forgotten MacBook Password Step 1: Reset Your Password With Your Apple ID If you set up your Apple ID during the setup process, you can easily use it to reset your MacBook password. Here is how: On the login screen, click the question mark icon next to the password fox. Choose the option to reset it using your Apple ID. When asked, enter your Apple ID and password to continue. Just follow the on-screen steps to reset your password. This method is effective when your MacBook is online and your Apple ID credentials are accurate. This method is effective when your MacBook is online and your Apple ID credentials are accurate. For more help on MacBook system errors, visit our article on Error 403 Forbidden on MacBook and Can’t Connect to Apple Servers. Step 2: Reset Password Using macOS Recovery Mode If you are unable to reset your password with your Apple ID, you can try using macOS Recovery Mode instead. Follow these steps: Shut down your MacBook completely Turn it on and hold Command + R until the Apple logo appears. In macOS Recovery, open the top menu, click Utilities, and select Terminal. In the Terminal, type reset password and hit Enter. A window will appear, allowing you to choose the volume with macOS. Select your startup disk. Follow the on-screen steps to reset your password. This method works even without an internet connection and is useful for those who are unable to access their Apple ID. Learn more about Do MacBooks Last Over a Decade? for tips on MacBook longevity. Step 3: Reset Your Password Through Another Admin Account If you have set up multiple admin accounts on your Mac, you can use another one to reset the forgotten password. Here is how: Log in to another admin account on your Mac. Open System Preferences and select Users & Groups. Choose the account for which you want to reset the password. Click Reset Password and enter a new one. Log out of the admin account and sign in with your new password. This method requires another admin account to be available on the device. Step 4: Unlock Your Mac With FileVault If FileVault is enabled, you can recover your password using the recovery key from setup. Here is how: On the login screen, click the question mark icon. Choose Reset it using the recovery key. Enter the recovery key you received during the FileVault setup process. Follow the on-screen prompts to reset your password. FileVault can be a lifesaver, as it helps protect your data and provides a way to recover your password. Step 5: Reinstall macOS If none of the above methods work, you can reinstall macOS as a last resort. This will delete all data on your Mac, so make sure to back up any important files if you can. Here is how: Boot your MacBook into Recovery Mode by holding Command + R while starting up. Choose Reinstall macOS and follow the on-screen instructions. Once macOS is reinstalled, you can set up a new password. Use this method only if you can not recover your password through other options and have no critical data on the device. Step 6: When to Contact Professional Help If you have tried everything and still can not access your MacBook, it might be time for professional help. Visit MacBook Repair Dubai for expert assistance. Our technicians can help you recover your password, fix system issues, and ensure your MacBook is back in working order. Bonus: Tips to Avoid Forgetting Your Password Again Secure Your Passwords: Keep your passwords safe and organized. Set Up two-factor authentication: For added protection, enable two-factor authentication on your Apple ID. Set a password hint: It can help you remember your password if you ever forget it. How to Access Your MacBook Pro Without a Password If you want to unlock a MacBook Pro without a password, the above methods will work on MacBook Airs and MacBook Pros. However, there are a few more tips you should consider: Use the Apple ID login method to reset the password. Utilize macOS Recovery Mode for password reset. Try FileVault recovery if your MacBook has FileVault enabled. If you cannot access your MacBook Pro using these methods, professional help is always available at MacBook Repair Dubai. Our team can assist with unlocking your MacBook Pro and restoring it to full functionality. You may also want to check our guide on MacBook Battery Replacement. Conclusion: Regain Access to Your MacBook Forgetting your password does not have to be a permanent problem. Whether you use your Apple ID, Recovery Mode, or FileVault, there are plenty of ways to recover your MacBook’s forgotten login password. If none work, visit MRD for professional assistance and fast recovery. For immediate help, do not hesitate to Contact Us — our expert team is ready to assist you 24/7. If you regularly experience issues like these, using a password manager and enabling two-factor authentication is best to avoid future problems. Final Contact Form First NameLast NameEmailPhone NumberDevice ModelYour MessageSubmit Form Related Posts Mac Guide Why Is My MacBook (M3) Not Charging? May 22, 2025-Abdul Aziz … Read More… How Can I Fix
How to Choose the Right Configuration for a MacBook
How to Choose the Right Configuration for a MacBook Buying a new MacBook feels great, but choosing the right setup can be a little confusing. With so many options like storage size, RAM, processor type, and screen size it is easy to feel confused. This guide will explain each option and help you choose the perfect setup based on your needs. At MacBook Repair Dubai, we help customers every day with Apple devices, so we know exactly what matters when picking the right MacBook configuration. Let’s make it easy and go through everything step by step. MacBook Configuration Guide: How to Choose the Right Specs for Your Needs 1. What Does Configuration Mean? A MacBook configuration refers to how your MacBook is set up on the inside. This covers: Processor (CPU) – The brain of your MacBook. Memory (RAM) – Helps your MacBook run apps smoothly. Storage (SSD) – Where your files, apps, and photos are saved. Graphics (GPU) – Important for gaming, video editing, and design work. Each of these choices affects the speed, performance, and price of your MacBook. If your MacBook screen is damaged or needs repair, check out our MacBook screen repair services to get professional help. 2. How Will You Use Your MacBook? Begin by considering, natural, and perfect for guiding readers. Here is a simple guide: Basic Use (School, Web, Netflix) 8 GB RAM 256 GB Storage M1 or M2 Chip The MacBook Air is a great option. Work or Multitasking (Office, Programming) 16 GB RAM 512 GB Storage or more M2 or M3 Chip MacBook Pro is recommended. Heavy Use (Video Editing, Gaming, Design) 16 GB+ RAM 1 TB Storage M3 Pro or M3 Max Chip A MacBook Pro with a high-end GPU is best. The powerful setup lets your MacBook run more and do more. 3. Understanding RAM and Why It Matters RAM (Random Access Memory) helps your Mac run multiple apps at the same time. If you mostly browse the web, 8 GB of RAM should be plenty. But for editing videos, using Photoshop, or writing code, 16 GB or more is better. Tip: RAM cannot be upgraded later, so it is smart to choose more from the start. For hardware issues and repairs, see our MacBook repair services. 4. Picking the Right Storage (SSD) Storage is where your data lives: photos, files, videos, and apps. For basic users, 256 GB is usually fine. But if you save a lot of videos or work on big projects, go for 512 GB or even 1 TB. Tip: Use iCloud or external drives to expand your storage without spending too much. 5. Choosing the Processor (CPU) The processor is like the brain of your MacBook. Apple’s M1, M2, and M3 chips are powerful and fast. M1 is great for everyday use, while M2 and M3 give you extra power for professional work. If you are into video editing or gaming, choose the M3 Pro or M3 Max for better speed and graphics. 6. Screen Size and Battery Life MacBook come in different sizes: 13-inch (MacBook Air): Light and portable 14-inch or 16-inch (MacBook Pro): Bigger screen, more power Smaller MacBook are easier to carry, while larger ones give more space for multitasking. Battery life is excellent across all models, but the MacBook Air usually lasts the longest. If you experience battery issues, check our MacBook battery replacement service. 7. Budget Considerations Of course, price matters. Higher specs cost more, but they last longer too. Choose a configuration that balances what you need now and what you might need in the future. At MRD, we also help users upgrade their MacBook when needed, so you are never stuck with the wrong choice. Final Thoughts: Make the Smart Choice Choosing the right MacBook configuration depends on how you use your device. Whether it is for school, business, or creative work, understanding your needs will help you pick the perfect setup. Still unsure which configuration is best for you? MRD is here to help. Our team can guide you through every step and even assist with upgrades, repairs, and expert advice right here in the UAE. Contact MacBook Repair Dubai today for personalized assistance and expert service. Final Contact Form First NameLast NameEmailPhone NumberDevice ModelYour MessageSubmit Form Related Posts Mac Guide Why Is My MacBook (M3) Not Charging? May 22, 2025-Abdul Aziz … Read More… How Can I Fix a MacBook Air That Won’t Charge? May 22, 2025-Abdul Aziz … Read More… How to Take a Screenshot on a MacBook May 15, 2025-Abdul Aziz … Read More… How to Change MacBook Name May 15, 2025-Abdul Aziz … Read More… How to Install Windows on MacBook Pro May 15, 2025-Abdul Aziz … Read More… How to Reset a MacBook May 15, 2025-Abdul Aziz … Read More… Load More End of Content.
White or Grey Horizontal Lines Appearing on MacBook Screen?
White or Grey Horizontal Lines Appearing on MacBook Screen? Have strange white or grey lines suddenly appeared on your MacBook screen? These horizontal lines can be frustrating and make your screen hard to use, even if everything works fine. It may look like a small issue, but it could mean something more serious inside your MacBook. In this blog, we will explain why these MacBook display problems happen and what you can do to fix them. Whether it is a screen error, a MacBook GPU issue, or a loose display cable, we will break it down in simple steps. If you are in the UAE and need help, MacBook Repair Dubai is ready to help you with fast and professional MacBook screen repair. What Do Horizontal Lines on a MacBook Screen Look Like? These lines can appear in different ways: Thin or thick white/grey lines running across the screen Flickering or static-like horizontal bars Lines that appear only when moving the screen or adjusting brightness Lines are visible even during startup or the login screen. These symptoms usually point to hardware-related issues, although software can sometimes be the cause. Common Causes of White or Grey Horizontal Lines Let’s explore what might be causing these screen problems on your MacBook: 1. Display Cable (Flexgate Issue) Apple’s thin design often leads to tension in the display cable. On some MacBook models, especially those with Retina displays, the cable connecting the screen to the logic board may wear out due to repeated opening and closing. Signs Lines appear when adjusting the lid The display sometimes goes black or flickers. Fix This requires a hardware repair or screen replacement. At MRD, we often resolve this by replacing the affected display cable or full-screen assembly. 2. Loose or Damaged Internal Connection If your MacBook has been dropped or banged, internal display connectors may be torn or torn. Signs Random blinking Lines appear irregularly Fix A technician can open the device and secure or replace the connectors. This is a quick fix in many cases. Check our full list of MacBook repair services in Dubai for help. This is a quick fix in many cases. 3. Faulty GPU (Graphics Processing Unit) A failing GPU can send distorted signals to the screen, causing white or grey lines. Signs Lines appear on both the built-in and external monitor. The screen freezes, crashes, or restarts randomly. Fix In some cases, a logic board repair or replacement may be needed. At MRD, we diagnose the GPU using special tools to confirm the issue before repair. 4. Screen Damage or Pressure Physical damage, even slight pressure, can cause permanent marks, lines, or screen failure. Signs Cracks, bleeding, or discoloration Horizontal or vertical lines that do not go away Fix You will likely need a full-screen replacement. We use genuine Apple displays to restore clarity and brightness. 5. Software or macOS Glitches (Rare) Apple’s thin design often leads to tension in the display cable. On some MacBook models, especially those with Retina displays, the cable connecting the screen to the logic board may wear out due to repeated opening and closing. While rare, software bugs or outdated graphics drivers can cause screen issues. Fix: Restart your Mac in Safe Mode Reset NVRAM and SMC Update to the latest version of macOS If the lines disappear in Safe Mode, the issue might be related to third-party software or display drivers. Quick Troubleshooting Tips Before you rush to a repair center, try these steps: Restart your Mac Reset the NVRAM/PRAM Boot in Safe Mode Connect to an external monitor Update macOS If the problem appears only on the MacBook screen, it is most likely a hardware issue. When to Seek Professional Help If you have tried the basic fixes and the lines are still there, it is time for a proper diagnosis. Delaying can lead to further damage or complete screen failure. At MRD, we offer: Free diagnostics Original screen replacements GPU and logic board repairs Fast service across Dubai & UAE Warranty on all repairs We will identify the exact issue and get your MacBook looking and working like new. Final Thoughts White or grey horizontal lines on a MacBook screen are often a sign of underlying hardware problems, especially screen cable issues, GPU faults, or panel damage. While some fixes are simple, most require professional tools and expertise. If you are in Dubai or anywhere in the UAE, MacBook Repair Dubai is your trusted partner for fast, affordable, and reliable MacBook screen repairs. Book your free checkup today and bring your screen back to life. Contact MacBook Repair Dubai today for a free checkup and bring your screen back to life. Final Contact Form First NameLast NameEmailPhone NumberDevice ModelYour MessageSubmit Form Related Posts MacBook Screen Repair MacBook Screen Issues MacBook Screen Fix What causes a long rectangle to appear on the MacBook Air screen? March 17, 2025-Abdul Aziz … Read More… How to Fix a Broken MacBook Screen? August 29, 2024-Abdul Aziz … Read More…
Migrating Data from Old MacBook to New MacBook Without iCloud
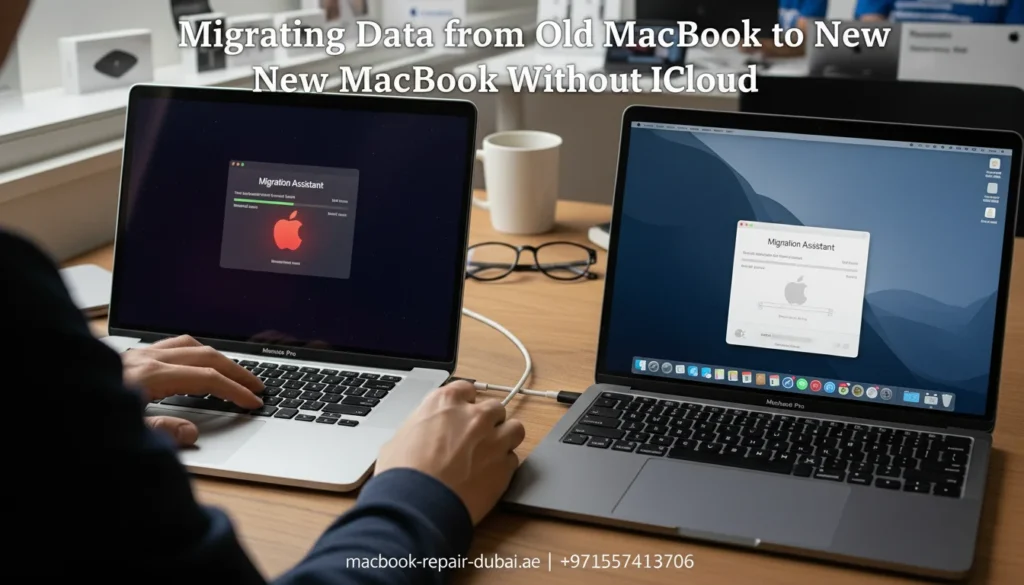
Migrating Data from Old MacBook to New MacBook Without iCloud Upgrading to a new MacBook is exciting, but moving all your files, apps, and settings can feel overwhelming, especially if you do not want to use iCloud. The good news? Apple gives you several simple ways to transfer data between MacBook, even without the internet. In this guide, we will show you how to safely migrate your data from an old MacBook to a new one using tools like Migration Assistant, Time Machine, and external drives with help from experts at MacBook Repair Dubai if needed. Why Not Use iCloud? While iCloud is convenient, it has limitations: Free storage is limited (only 5 GB) Uploading and downloading large files takes time. You might not want your personal files on the cloud. That is why many users choose offline methods that are secure, fast, and under their control. Best Methods to Transfer Mac Data Without iCloud 1. Using Migration Assistant (Recommended) Migration Assistant is Apple’s built-in tool for transferring data. You do not need iCloud, just a direct connection between the Macs. Steps: Connect both MacBook via Thunderbolt, USB-C, or the same Wi-Fi network (wired is faster). On the new MacBook, open Migration Assistant (Applications > Utilities). Choose to restore from a Mac, Time Machine backup, or startup disk. On the old Mac, also open Migration Assistant and choose to transfer to another Mac. Follow the prompts and choose what to transfer apps, profiles, settings, or documents. This is one of the most complete and efficient ways to move your data. If the process doesn’t work, our team can provide MacBook setup and data recovery support in Dubai. 2. Using a Time Machine Backup Already using a Time Machine? It is a smart and seamless way to transfer your data. Steps: Connect your Time Machine external drive to the new MacBook During setup, choose to restore from a Time Machine backup, select the right one, and follow the steps. Benefits: Quick, secure, and no internet needed. You also get the added benefit of having a full backup. 3. Manual Transfer with an External Drive If you prefer to manually move only some files, use a USB, SSD, or external hard drive. Steps: Plug the drive into the old MacBook. Drag and drop the files (Documents, Pictures, Music, etc.) onto the drive. Plug the same drive into the new MacBook and copy the files. This method is good for light users or if you only need certain files (like photos or work documents). However, it would not transfer apps or system settings. 4. AirDrop (For Smaller Files) AirDrop is useful for wirelessly moving a few files between two nearby MacBook. Steps: Enable AirDrop on both devices (Finder > AirDrop). Drag and drop files onto the new MacBook’s icon. Fast for small files but not suitable for full migration. For large data transfers, Migration Assistant or Time Machine is a better choice. Bonus Tips Before Migrating Update macOS on both machines for the smoothest experience. Organize your old MacBook before transferring to avoid moving clutter. Have a power source connected during long transfers. If you are unsure or the data is critical, consult MacBook Repair Dubai for expert help. For peace of mind, let a pro handle the process—our team at MacBook Repair Dubai can help with data transfers and upgrades What to Do After the Transfer After the data migration is done: Check your files to make sure everything moved properly. Reinstall any apps that did not transfer (especially if you used the manual method). Sign back into your Apple ID and other accounts. Erase your old MacBook if you are selling or giving it away. Why Trust MacBook Repair Dubai? At MacBook Repair Dubai, we help customers across the UAE with safe, reliable MacBook upgrades and data transfers. Whether you are a business user or a student, our team ensures your important files and memories move smoothly from one device to the next. We also offer: Professional data migration services without iCloud Troubleshooting if Migration Assistant fails Secure erasure of old MacBook before resale Final Thoughts Migrating data from an old MacBook to a new one without iCloud is not as hard as it seems. Tools like Migration Assistant, Time Machine, and external drives make it easy to switch devices without losing anything important. Just follow the right method that suits your needs, and if you ever need assistance, reach out to MRD; we are here to help you every step of the way. Contact Us for Professional Data Transfer Final Contact Form First NameLast NameEmailPhone NumberDevice ModelYour MessageSubmit Form Related Posts Mac Guide Why Is My MacBook (M3) Not Charging? May 22, 2025-Abdul Aziz … Read More… How Can I Fix a MacBook Air That Won’t Charge? May 22, 2025-Abdul Aziz … Read More… How to Take a Screenshot on a MacBook May 15, 2025-Abdul Aziz … Read More… How to Change MacBook Name May 15, 2025-Abdul Aziz … Read More… How to Install Windows on MacBook Pro May 15, 2025-Abdul Aziz … Read More… How to Reset a MacBook May 15, 2025-Abdul Aziz … Read More… Load More End of Content.
